My Terminal
This is where I share my setup for my Terminal, it works cross-platform (almost). It features ZSH, Oh My ZSH!, FZF and Tmux.

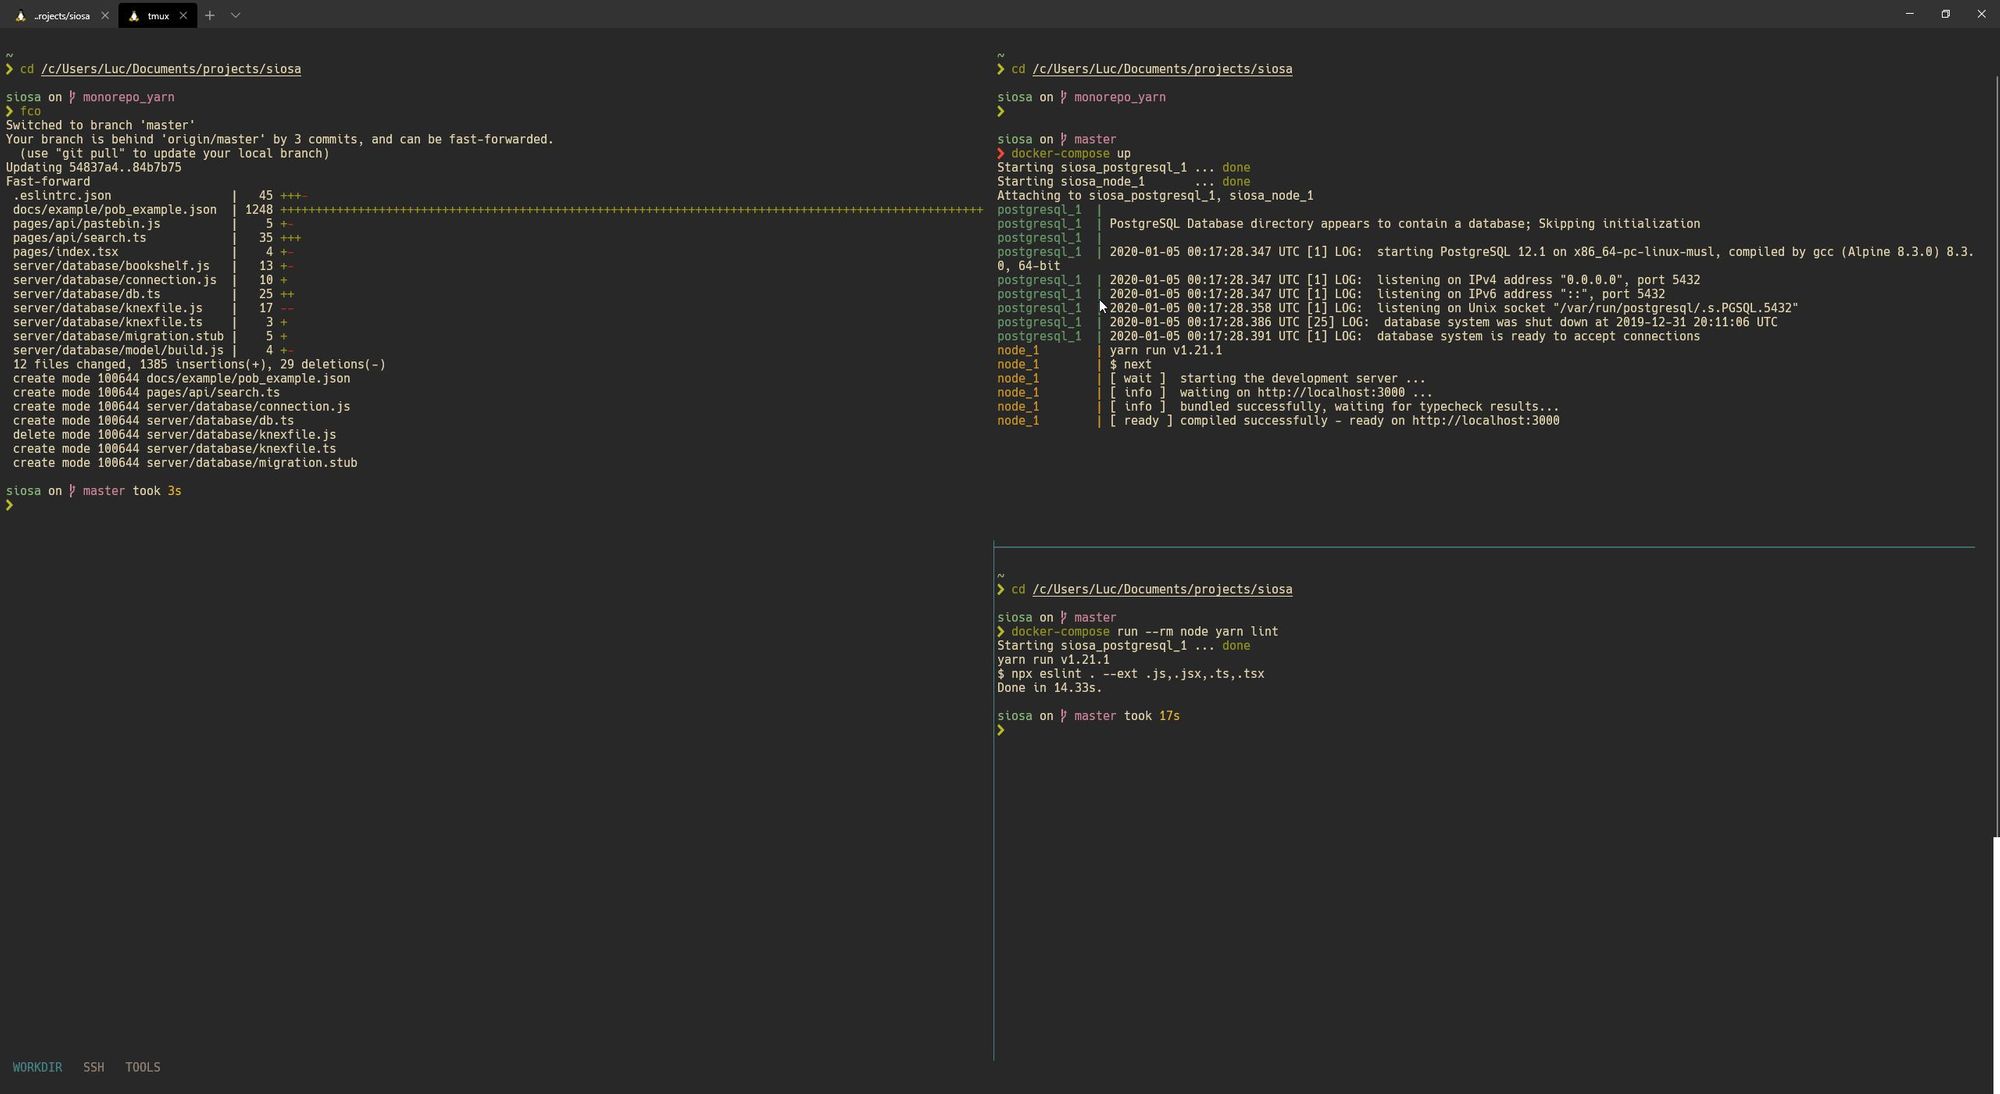
I guess starting by showing you the terminal works better than just describing it. This post will be about sharing how I customized and setup my terminal. It will also serve me as documentation as I had to recently recreate it on a new machine (windows) and I had a hard time to remember everything.
Color Scheme
First thing first when you look at a terminal you'll notice the color scheme. I use one called Gruvbox Dark as it has darkish pastels colors that please my eyes, a light version exists as well.
You can find this theme for almost any program that support themes on the Github repository.
Oh My ZSH!
I'm using ZSH as it offers a lot compared to BASH and I like the plugin ecosystem that revolves around it. As I'm not a heavy (like heavy heavy) user of my terminal I'm satisfied by its speed. If you're looking for a framework more performant I'm sure those exists, you could also take a look at Fish Shell that embed most of the feature I'll show here.
You can find a way to install Oh My ZSH! for your system on their Github repository.
The next part will depend on ZSH and Oh My ZSH!, but I'm sure you can find equivalent for your shell.
Theme
I'm using the Spaceship theme that offers a lot of customization for the prompt.
I'm using it with the Hack Nerd Font, that you can find in the Nerd Font package.
To get the special character I have for the prompt start, I use the character \uf054.
ZSH_THEME="spaceship"

# ORDER
SPACESHIP_PROMPT_ORDER=(
  time
  user
  host
  dir
  git
  exec_time
  line_sep
  vi_mode
  jobs
  exit_code
  char
)

SPACESHIP_CHAR_SYMBOL="\uf054 "
SPACESHIP_USER_SHOW="true"Plugins
Those are the plugins from Oh My ZSH! I'm using:
plugins=(
  git
  zsh-syntax-highlighting
  sudo
  urltools
  encode64
  docker
  tmux
  colorize
)All but zsh-syntax-highlighting are coming out of the box with Oh My ZSH!.
Syntax Highlighting
"It enables highlighting of commands whilst they are typed at a zsh prompt into an interactive terminal." It is very handy for me to know what command are available. Depending on the system, I may not have install a particular package or dependency.
You can find the pluging here and follow install instructions.
ZSH Autosuggestions
I think this is for me the best plugin available and saving me a ton of time while typing commands or input in my terminal. Based on my shell history this plugin will suggest me while typing the command I've ran in the past and I can leverage this to auto-complete my current prompt.
I had to install manually and ignore the setup as a Oh My ZSH! plugin, for some reason it wasn't finding it.
FZF
This application is a life saver. On its own it doesn't do much, but when coupled to any other command it becomes very powerful. It allows you to have fuzzy input to any command. I use it daily. Here are a few example:
Git
Coupled with git command, it allows me to switch branches while fuzzy searching for it.
fco() {
  local branches branch
  branches=$(git branch) &&
  branch=$(echo "$branches" | fzf +m) &&
  git checkout $(echo "$branch" | awk '{print $1}' | sed "s/.* //") &&
  gl
}fbr() {
gfa
local branches branch
branches=$(git branch --all | grep -v HEAD) &&
branch=$(echo "$branches" |
fzf-tmux -d $(( 2 + $(wc -l <<< "$branches") )) +m) &&
git checkout $(echo "$branch" | sed "s/.* //" | sed "s#remotes/[^/]*/##")
gl
}
gitstat() {
  gfa > /dev/null
  local branches branch1 branch2 branchSha1 branchSha2 diffs
  branches=$(git branch --all | grep -v HEAD) &&
  branch1=$(echo "$branches" |
           fzf-tmux -d $(( 2 + $(wc -l <<< "$branches") )) +m) &&
  branch2=$(echo "$branches" |
           fzf-tmux -d $(( 2 + $(wc -l <<< "$branches") )) +m) &&

  cleanBranch1=$(echo "$branch1" | sed "s/.* //") &&
  cleanBranch2=$(echo "$branch2" | sed "s/.* //") &&
  branchSha1=$(git rev-parse $cleanBranch1) &&
  branchSha2=$(git rev-parse $cleanBranch2) &&
  diffs=$(git diff --shortstat "$branchSha1"..."$branchSha2") &&
  echo "$cleanBranch1 <-> $cleanBranch2" &&
  echo "$diffs"
}
This snippet allows me to see the number of adds and deletions between 2 branches. Basically what github shows on PR/commits, something I miss when not using Github.
Utilities
There are two snippets that ease my life:
# fd - cd to selected directory
fd() {
  local dir
  dir=$(find ${1:-.} -path '*/\.*' -prune \
                  -o -type d -print 2> /dev/null | fzf +m) &&
  cd "$dir"
}

# fh - search in your command history and execute selected command
fh() {
  eval $( ([ -n "$ZSH_NAME" ] && fc -l 1 || history) | fzf +s --tac | sed 's/ *[0-9]* *//')
}
The first one allows me to cd somewhere while searching for it with fuzzy search.
The second one I use it when ctrl+r isn't mapped to search through my command history.
Tail with color
This one allows me to tail log file and color each line depending on the level of the log:
tailf-with-colors () {
    if [ -z "$1" ] ; then
        echo "Please specify a file for monitoring"
        return
    fi

    tail -f $1 | awk '
                {matched=0}
                /INFO:/    {matched=1; print "\033[0;37m" $0 "\033[0m"}   # WHITE
                /NOTICE:/  {matched=1; print "\033[0;36m" $0 "\033[0m"}   # CYAN
                /WARNING:/ {matched=1; print "\033[0;34m" $0 "\033[0m"}   # BLUE
                /ERROR:/   {matched=1; print "\033[0;31m" $0 "\033[0m"}   # RED
                /ALERT:/   {matched=1; print "\033[0;35m" $0 "\033[0m"}   # PURPLE
                matched==0            {print "\033[0;33m" $0 "\033[0m"}   # YELLOW
        '
}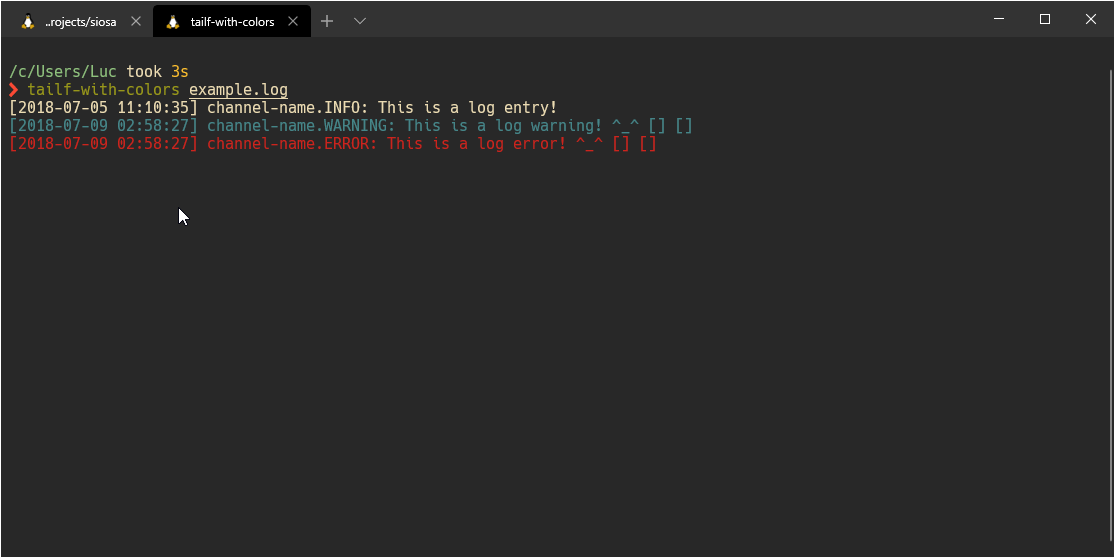
The command is started with the -f option as this is mostly how I use the command.
Tmux
I also happen to use Tmux as it is cross-platform and I used it for quite some time that old habits die hard.
Nothing really fancy going on here's the full file:
# change the prefix from 'C-b' to 'C-a'
# (remap capslock to CTRL for easy access)
unbind C-b
set-option -g prefix C-a
bind-key C-a send-prefix
bind a last-window

# start with window 1 (instead of 0)
set -g base-index 1

# start with pane 1
set -g pane-base-index 1

# split panes using | and -
bind | split-window -h
bind - split-window -v
unbind '"'
unbind %

# reload config file
bind r source-file ~/.tmux.conf

unbind p
bind p previous-window

# don't rename windows automatically
#set -g renumber-windows on
#set -g automatic-rename off
set-option -g allow-rename off

# mouse control (clickable windows, panes, resizable panes)
set -g mouse on

# Use Alt-arrow keys without prefix key to switch panes
bind -n C-Left select-pane -L
bind -n C-Right select-pane -R
bind -n C-Up select-pane -U
bind -n C-Down select-pane -D

bind-key -n S-Up set-option -g status
bind-key -n S-Down set-option -g status
bind-key -n S-Left previous-window
bind-key -n S-Right next-window

# Override the default command to use `reattach-to-user-namespace` for everything.
set -g default-command "reattach-to-user-namespace -l ${SHELL}"

bind-key -T copy-mode-vi 'y' send-keys -X copy-pipe-and-cancel 'reattach-to-user-namespace pbcopy'

# Size up history size
set -g history-limit 50000

set -g default-terminal "screen-256color"
set-window-option -g xterm-keys on
set -g escape-time 0

# focus events enabled for terminals that support them
set -g focus-events on

# super useful when using "grouped sessions" and multi-monitor setup
setw -g aggressive-resize on

set-option -g status-position bottom
set-option -g status-fg colour2
set-option -g status-bg default
set-option -g status-attr default
set-window-option -g window-status-fg colour8
set-window-option -g window-status-bg default
set-window-option -g window-status-attr default
set-window-option -g window-status-current-fg colour4
set-window-option -g window-status-current-bg default
set-window-option -g window-status-current-attr default
set-option -g message-fg white
set-option -g message-bg black
set-option -g message-attr bright
set -g status-left ""
set -g status-justify left
setw -g window-status-format         ' #W '
setw -g window-status-current-format ' #W '
set -g status-right " "

# pane
setw -g pane-border-status off
setw -g pane-border-format ""
setw -g pane-border-bg default
setw -g pane-border-fg colour0
set -g pane-active-border-style fg=colour4,bg=default


set -g @plugin 'tmux-plugins/tpm'
set -g @plugin 'tmux-plugins/tmux-resurrect'

# Initialize TMUX plugin manager (keep this line at the very bottom of tmux.conf)
run '~/.tmux/plugins/tpm/tpm'
The key concepts here are:
- Rebinging the
ctrl+btoctrl+aas I happen to have themajkey binded asctrlsoctrl+ais very handy to do. - Using
|and-for dividing my panes, it is very straight forward. - Binding
pfor going back to the previous window I was on. - Don't rename automatically the windows.
shift+upandshift+downare used to show/hide the status bar.shift+leftandshift+rightto navigate through the windowsctrl+up/down/right/leftto navigate trhough the panes within the window.- Here to copy behaviour is for MacOS
- And then some bits of UI for the status bar.
- Using Tmux resurrect to save/load sessions if I inavertidly close the terminal, I can bring it back.
And that's pretty much it, I refined this setup through the past few years, it didn't much recently if not for some tweaks there and there.
You can find the complete files here.